


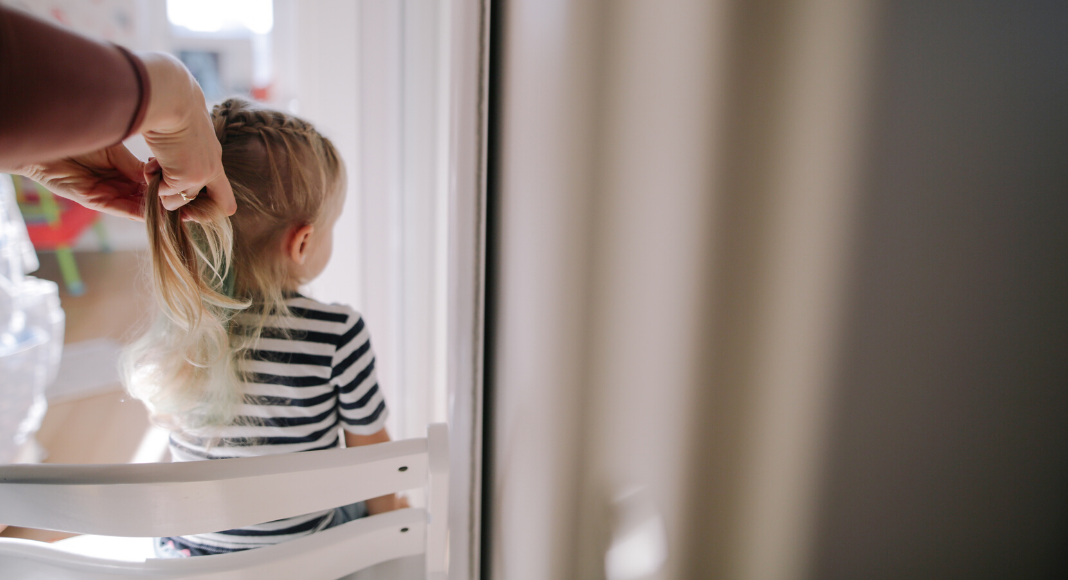
 Warm weather is around the corner, and I don’t know about you, but I just want my hair off my neck and face one it becomes sweaty season. My daughters are no different, and I discovered last year that a standard ponytail or messy bun really doesn’t mix well with swimming or water play – they may keep hair out of the way, but turn into a tangled mess in the process! Below are a few of our tried and true easy hairstyles that work for moms and kids alike, to help keep cool while keeping hair from turning into a birds nest. They’re also quick – a bonus when you’re trying to rush through busy mornings!
Unicorn Twist
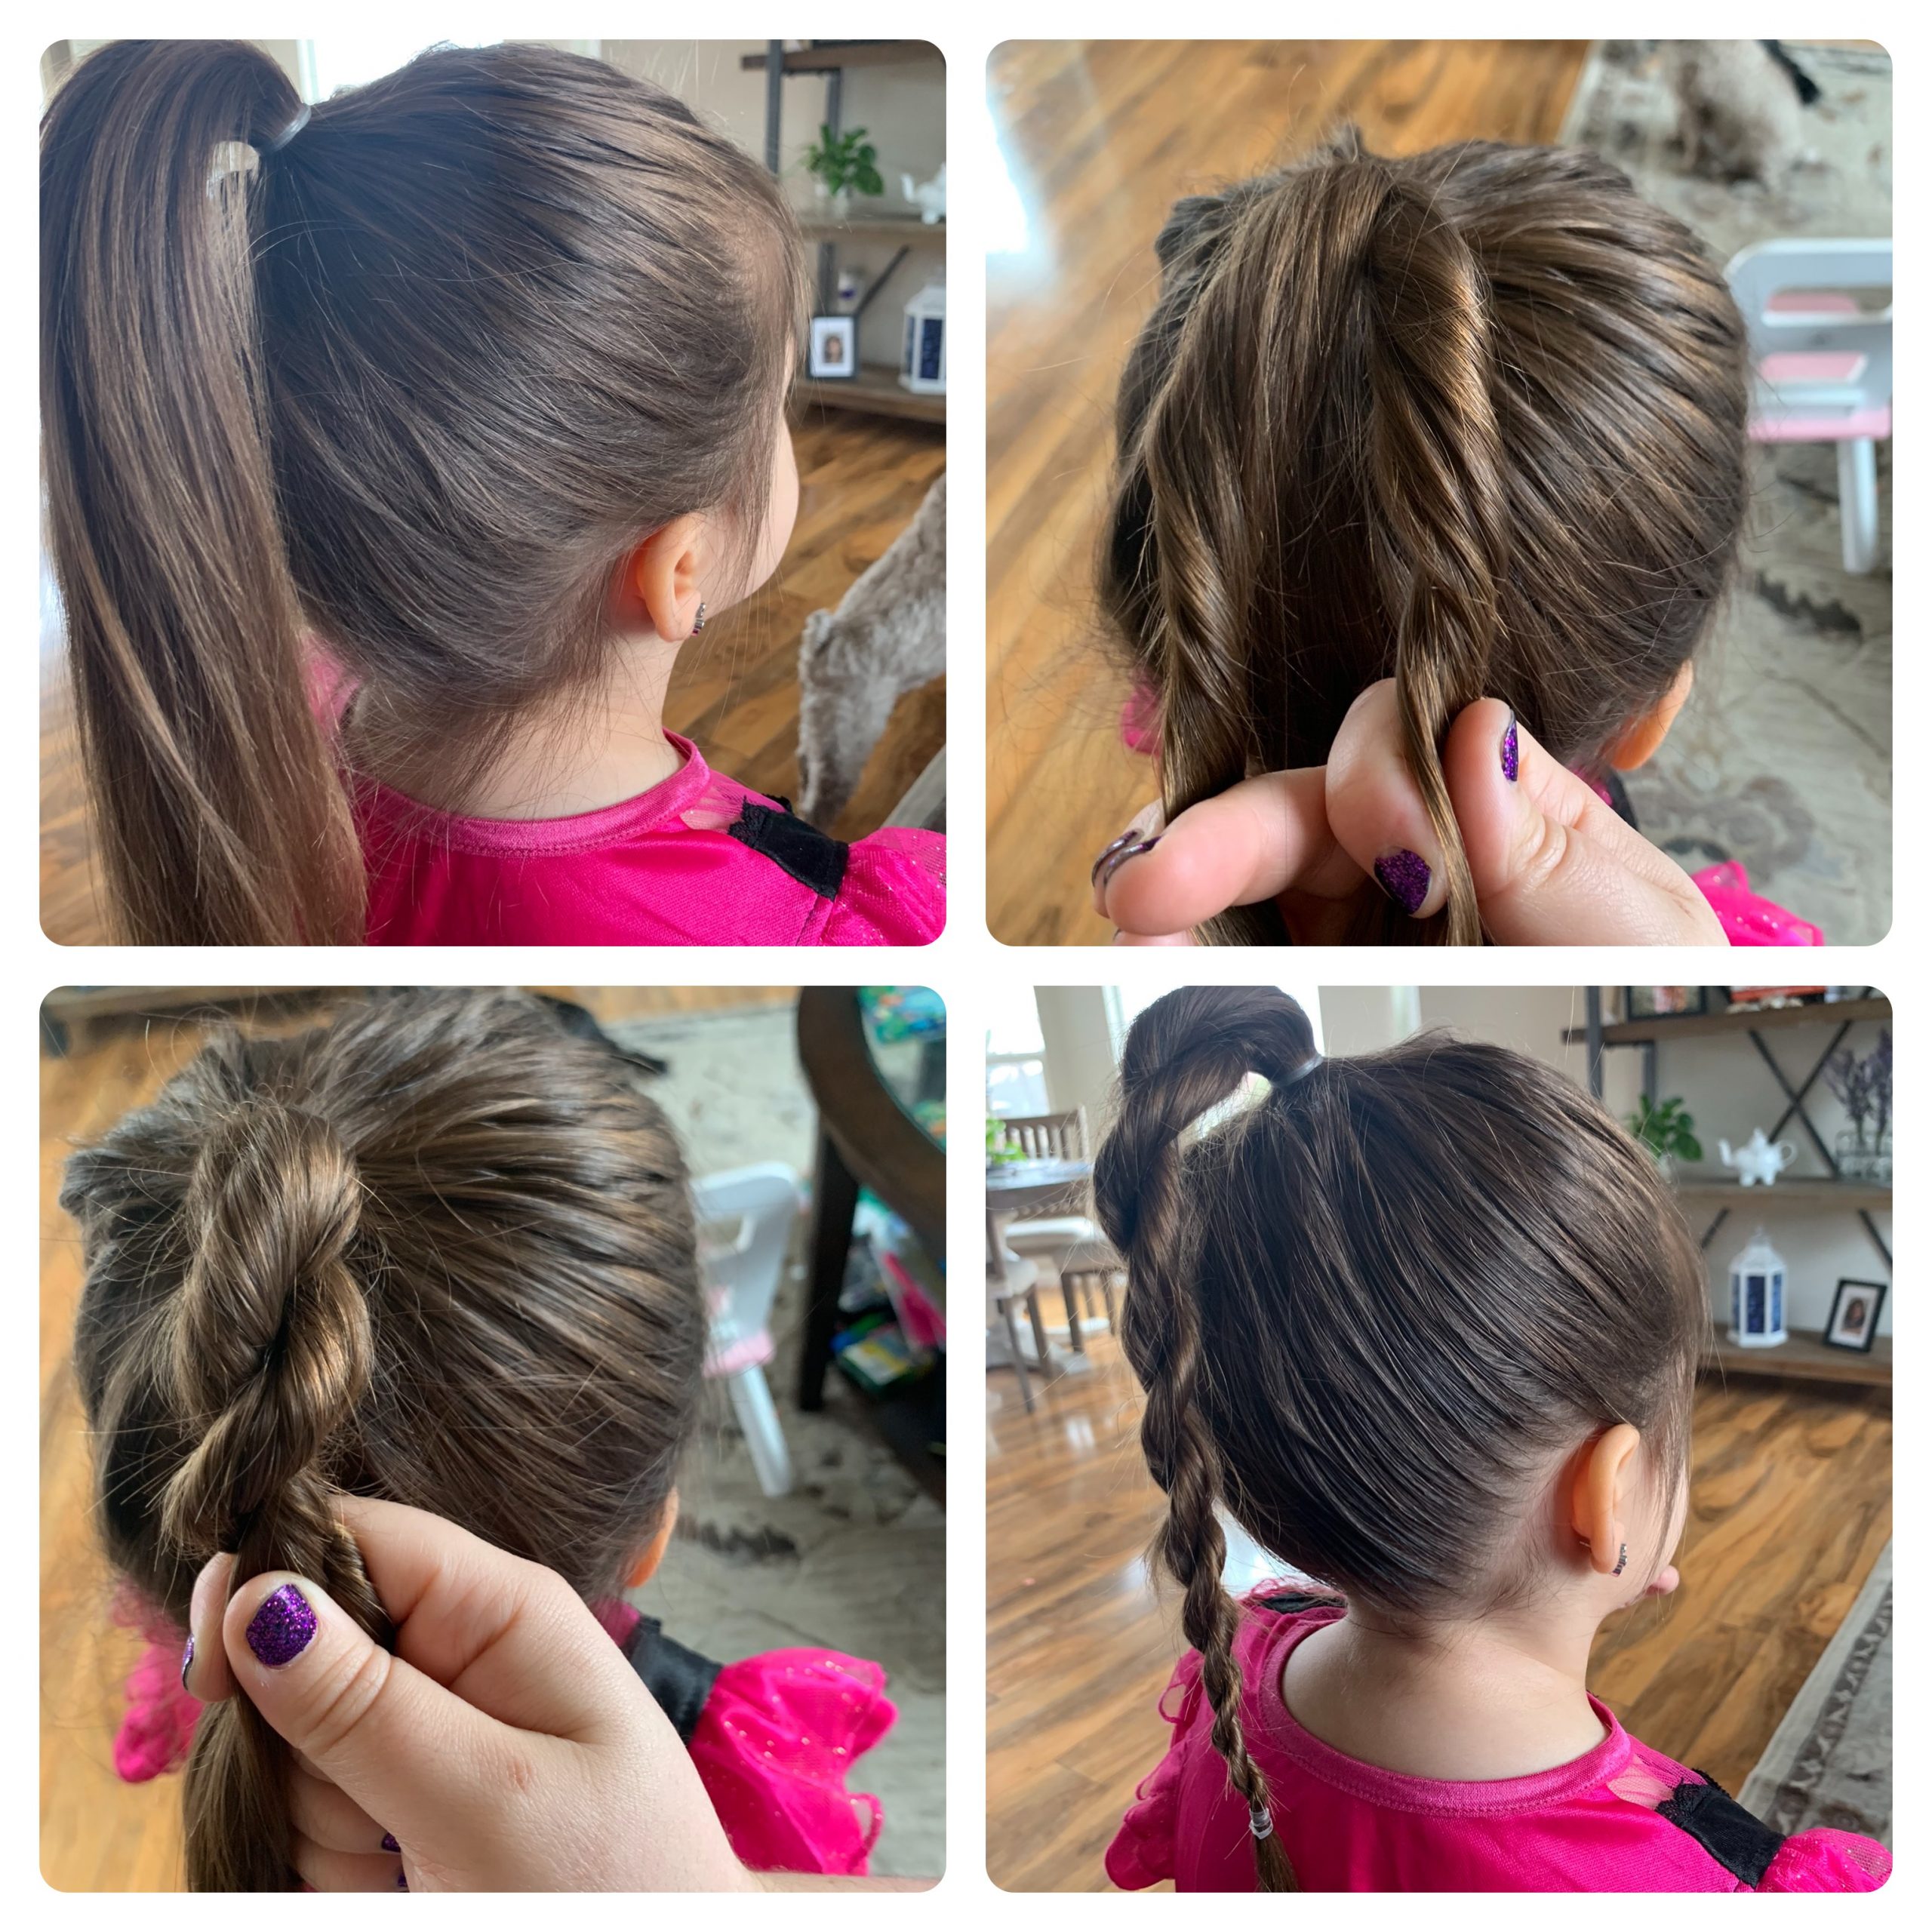
1. Pull all hair into a ponytail. This can work on high or low ponies!
2. Split the ponytail in half, and twist each section clockwise (it might be instinct to twist them in opposite directions of each other, but make sure they’re both twisting the same way).
3. Take the twisted sections and cross them over each other counter-clockwise.*
4. Continue twisting the two pieces and wrapping them around each other in the opposite direction until you reach the bottom. Secure with an elastic and smooth any flyaways with spray gel. You can take it a step further by wrapping the twist into a bun and securing with a few bobby pins.
*Twisting the pieces separately then crossing in the opposite direction helps keep the two sections separate and defined. Skipping this step will make a messy twist that comes undone very fast! I speak from experience.
Mermaid Tail
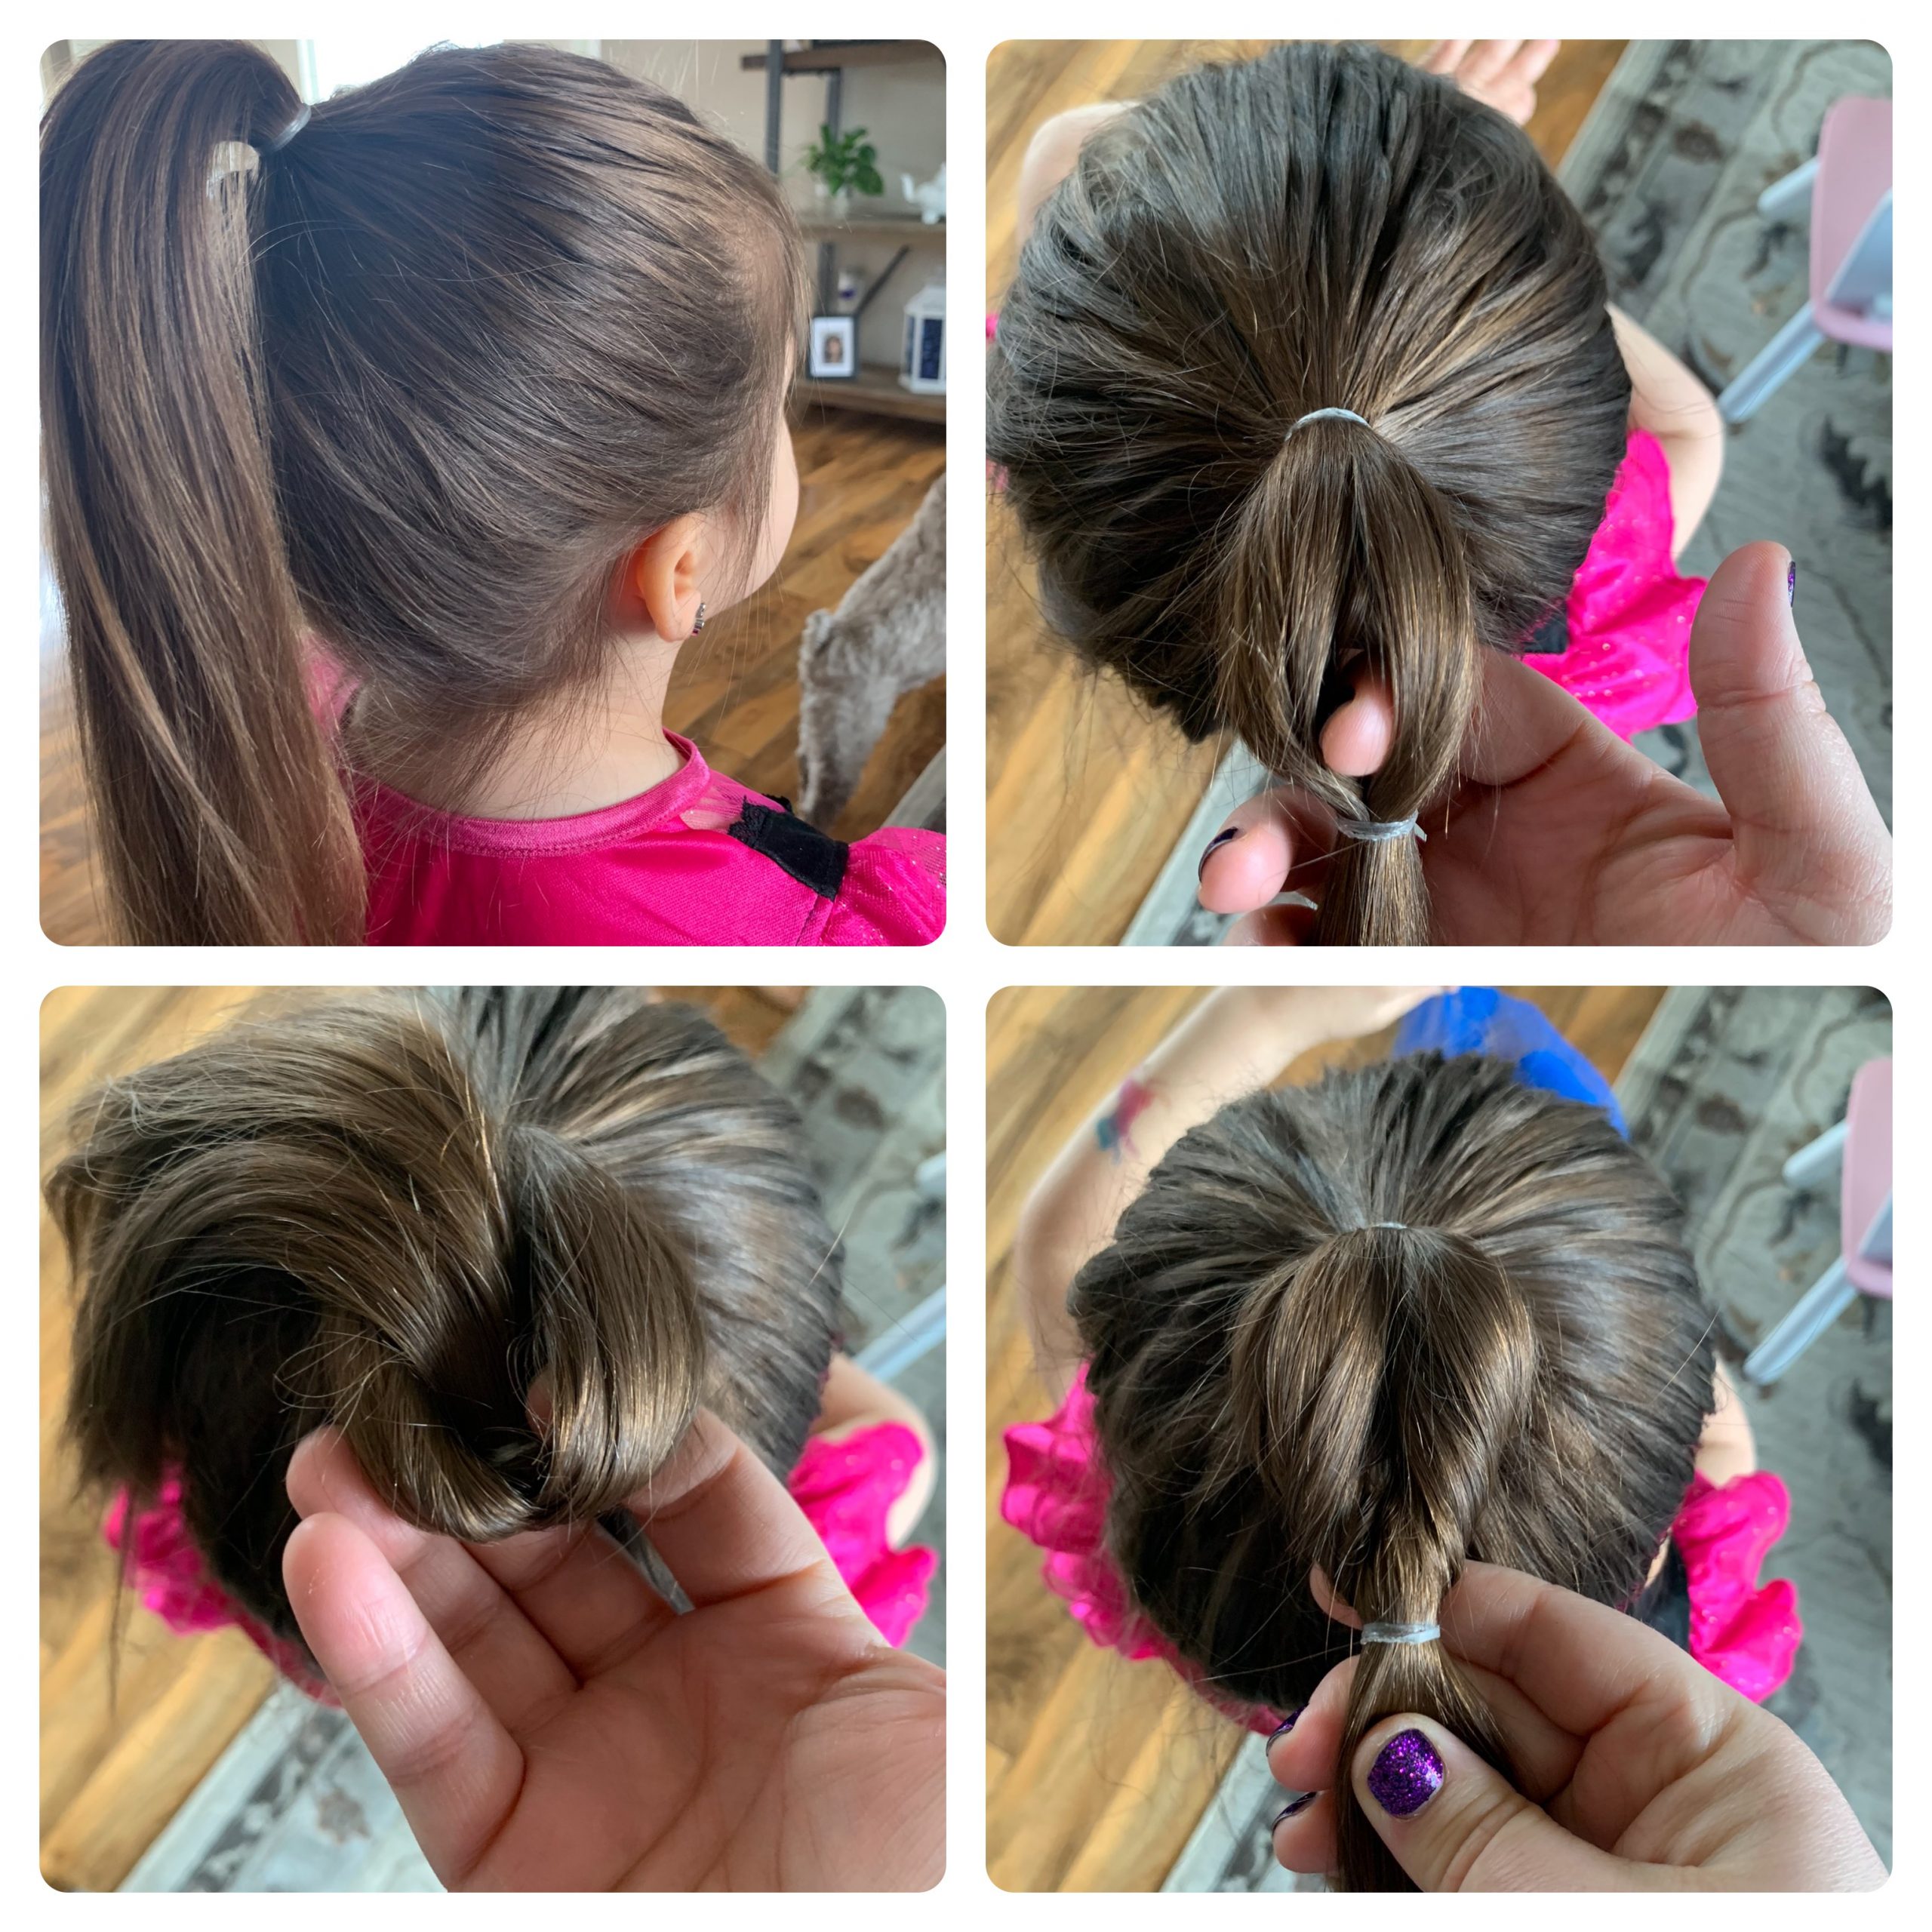 1. Pull all hair into a ponytail. This style can also work on high or low ponies!
2. Secure a second elastic 2-3” inches below the first elastic of the ponytail and use your finger to make a hole in the section between the two elastics.
3. Feed the rest of the free ponytail through the hole.
4. Tighten the elastic and “fluff” the pieces on either side to add fullness.
 5. Repeat with a new section every 2-3 inches down the length of the ponytail.
This ends up looking similar to a fishtail braid, but is much simpler!
The next two work on shorter lengths as well. One of my girls decided on a cute bob last summer, and these worked on both her and her longer-haired sister!
Flippy Pony
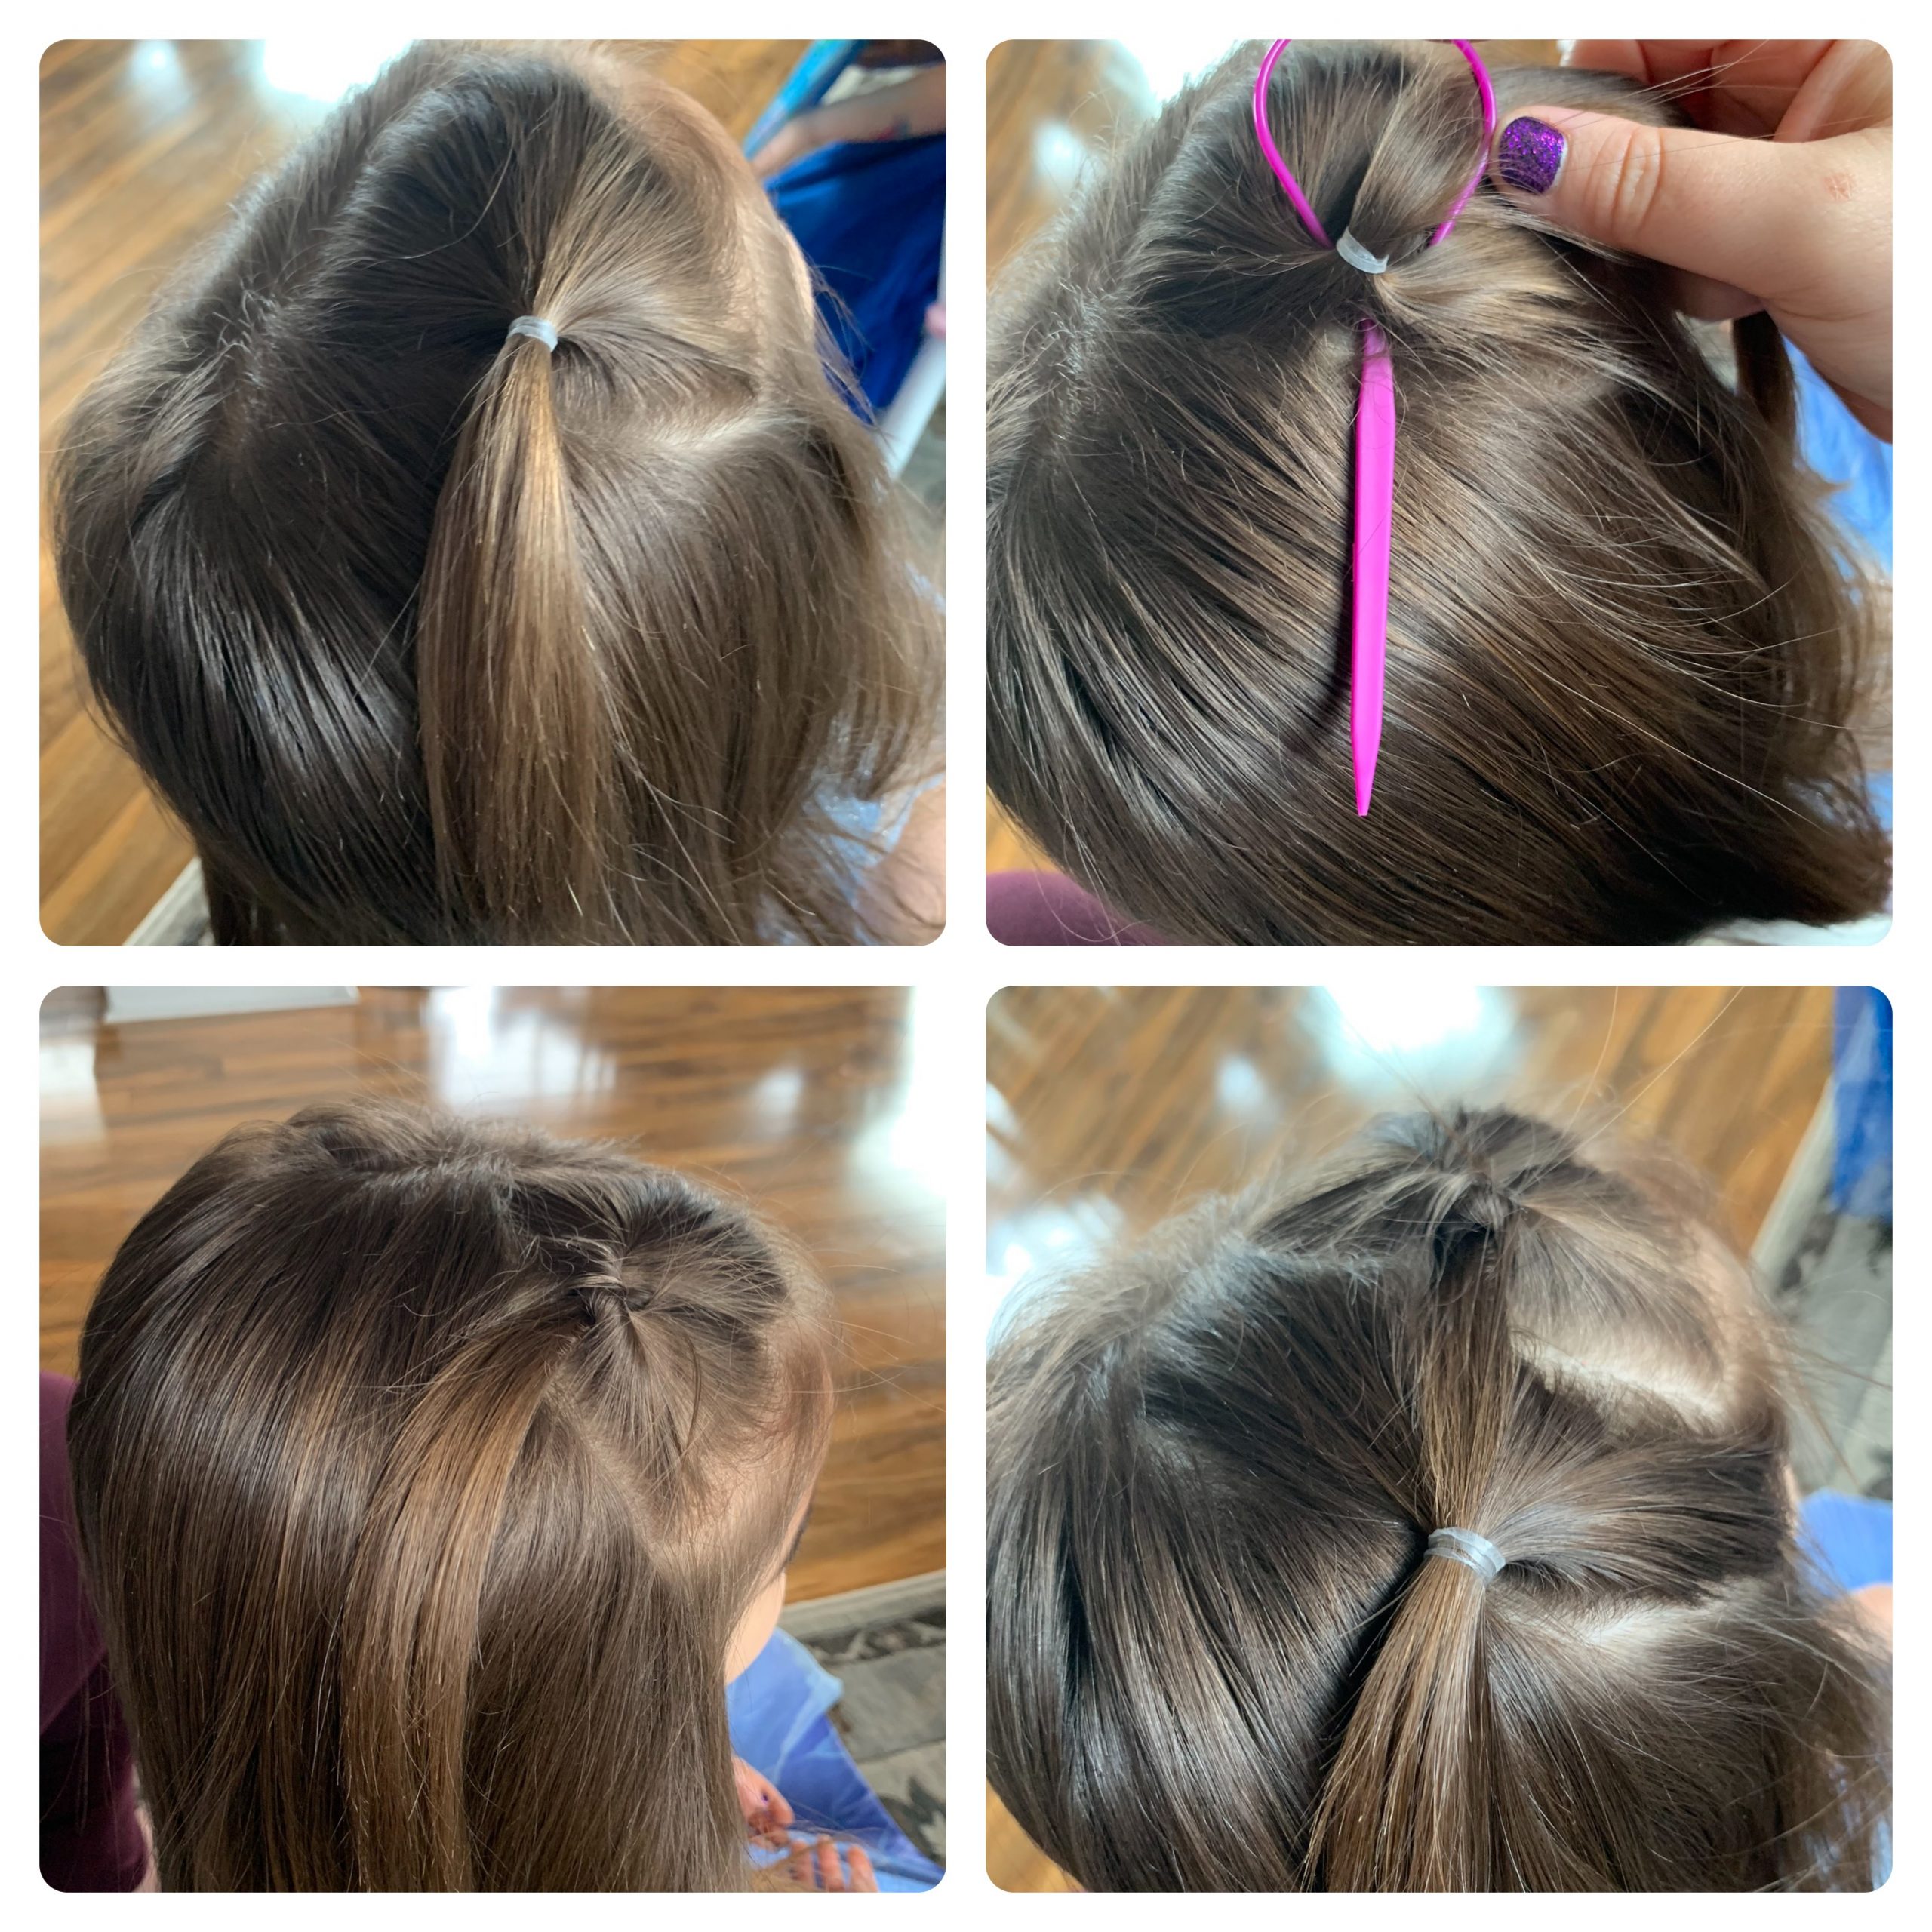
1. Secure a small section near the hairline with an elastic. Make sure not to put the elastic too tight.
2. Using a topsy-tail tool, insert the pointy end under the elastic and feed the free-hanging part of the section into the loop of the tool.
3. Pull the tool towards you, which will flip the section under itself. You could also accomplish this by using the pointy end of a parting comb or teasing brush, or even a pen, to create a hole under the elastic and push the rest of the section through the hole – the tool just makes it much easier and neater! Pull on the hair to tighten the newly formed “flippy-tail” as we call it.
4. Take a new section of hair behind the first, adding the loose hairs from the flippy tail. 
5. Repeat the previous action – insert the pointy end of the topsy-tail tool under the elastic, feed the loose hair through the loop, and pull towards you. YouTube has great tutorials on how to use these kind of hair tools if you’re intimidated by them!
6. Tighten the new, larger flippy tail to secure. At this point, you can either leave the hair as-is for a cute half-up style, or 7. gather the rest of the hair into a ponytail. Both of my girls like the half-up version for school so that they can still have most of their hair down, but the front stays out of their faces and stays in place!
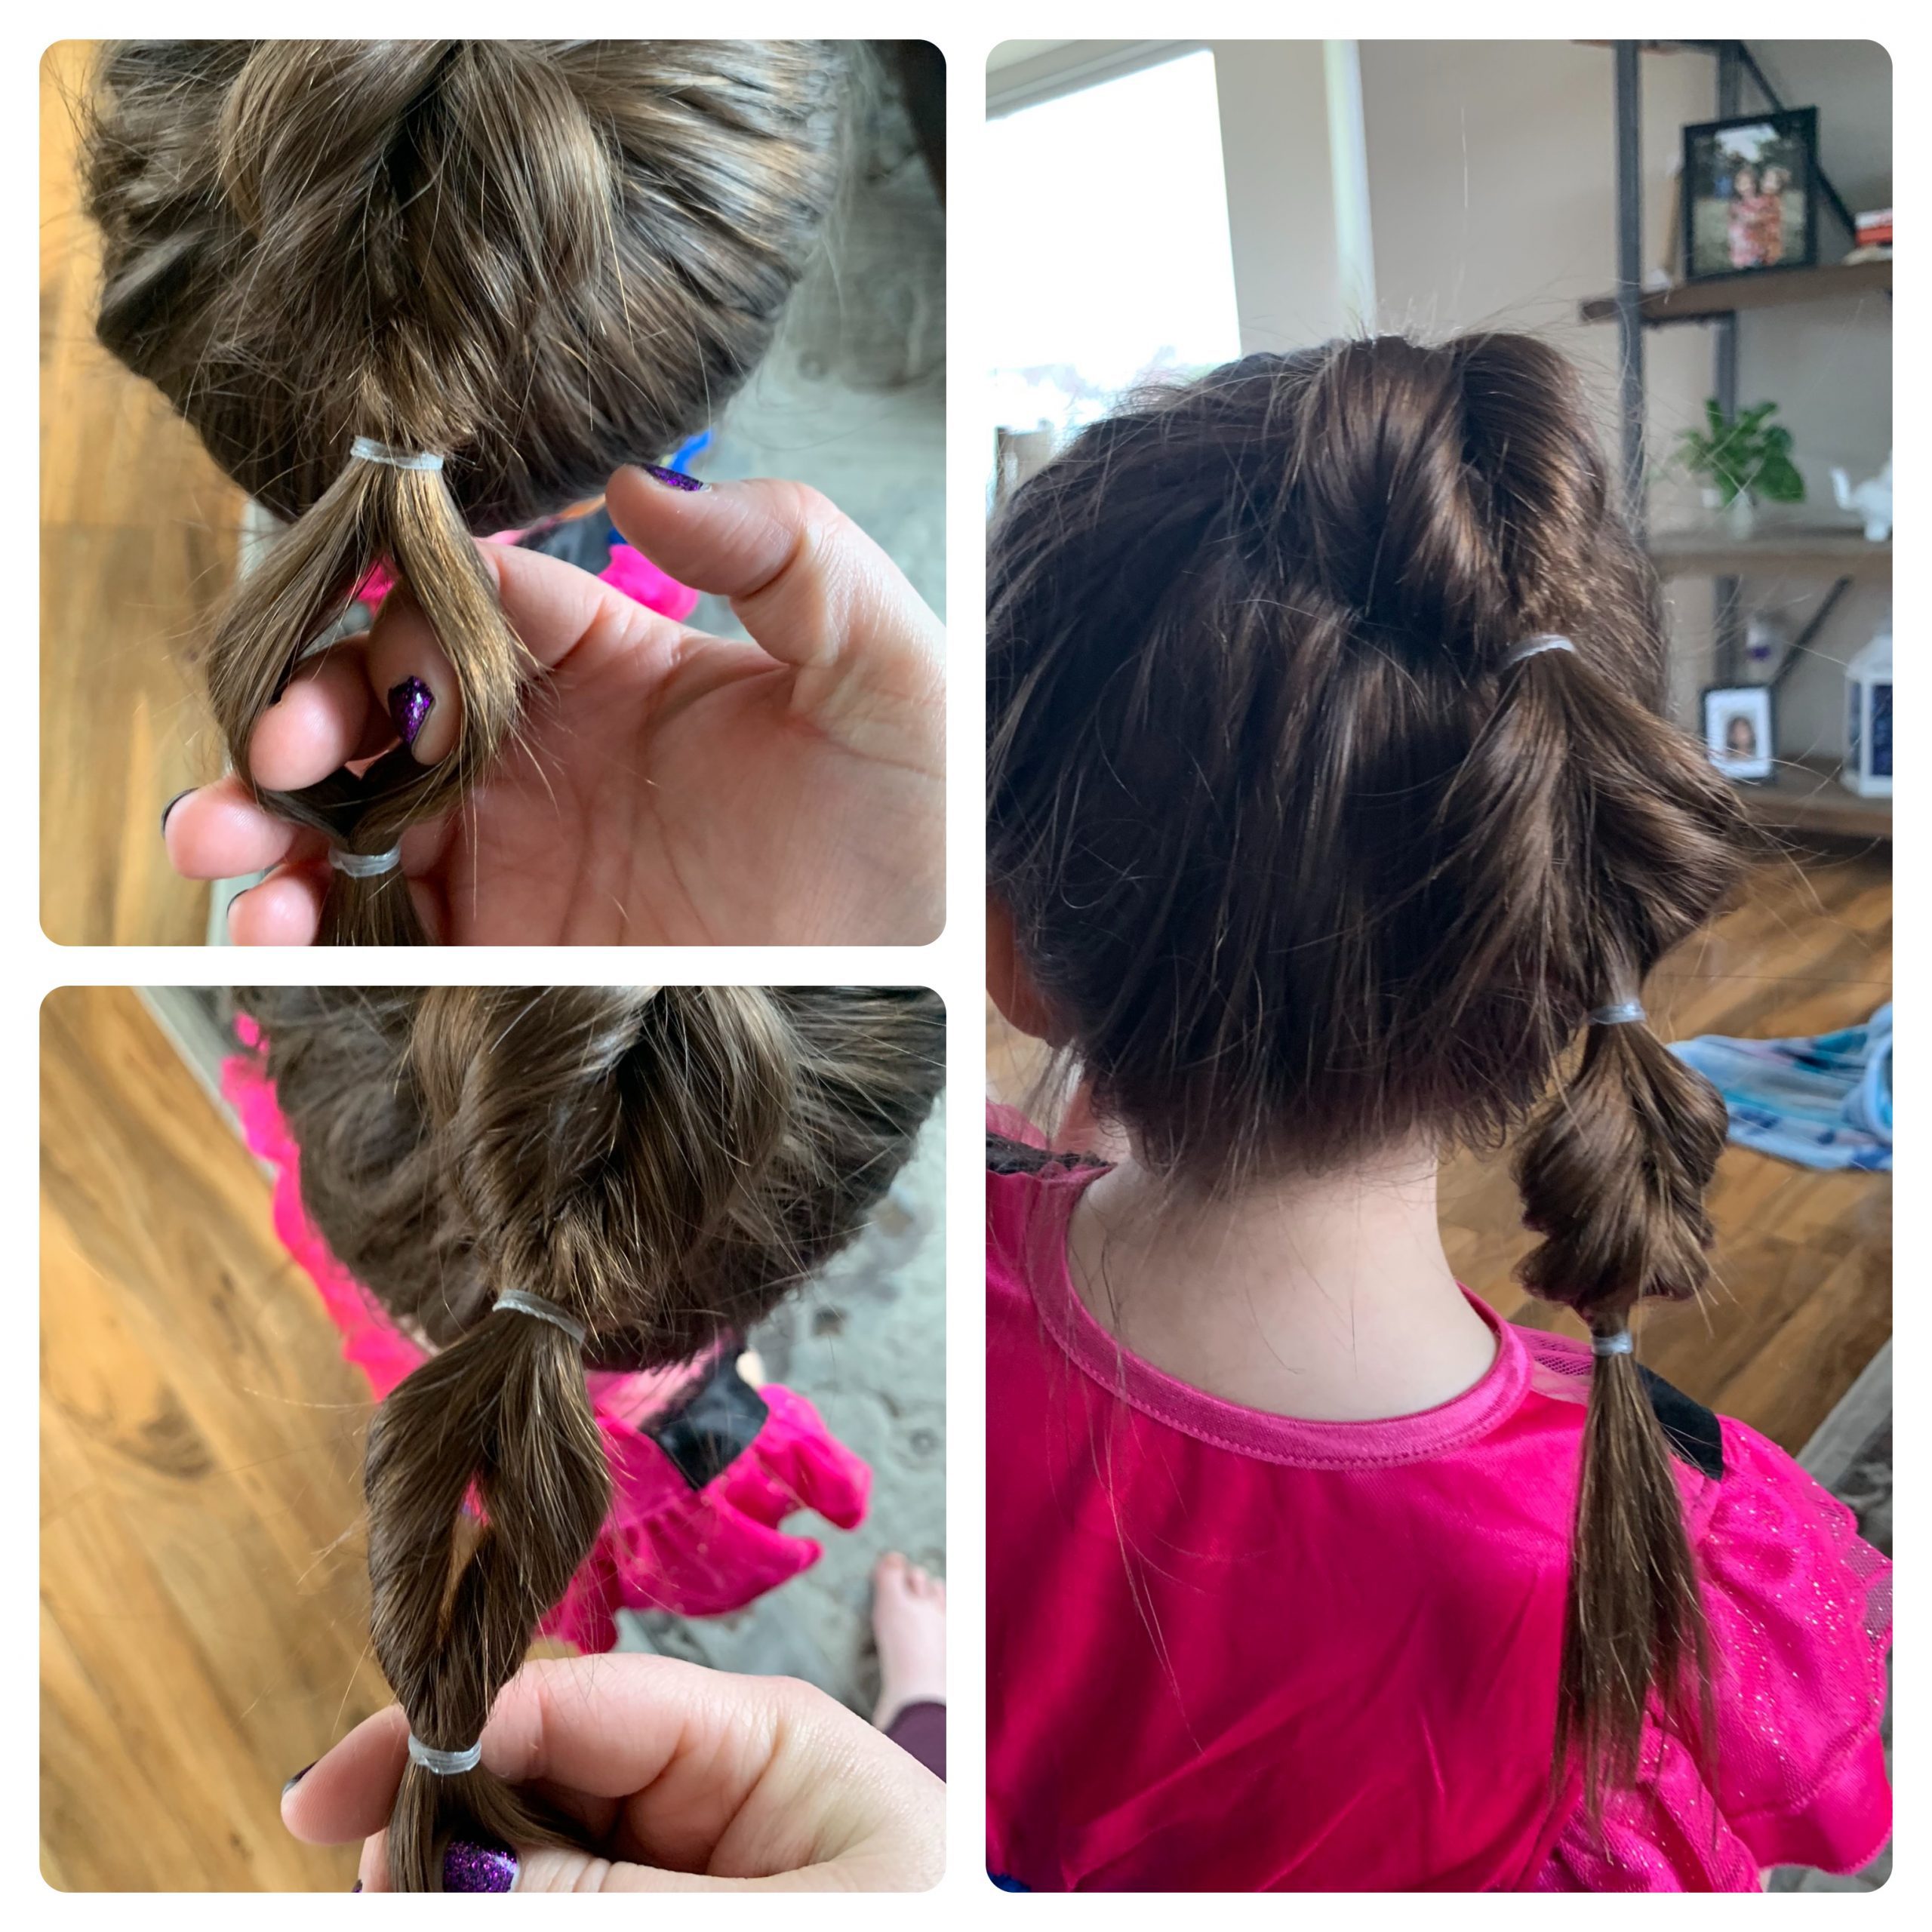
Bubble Braid
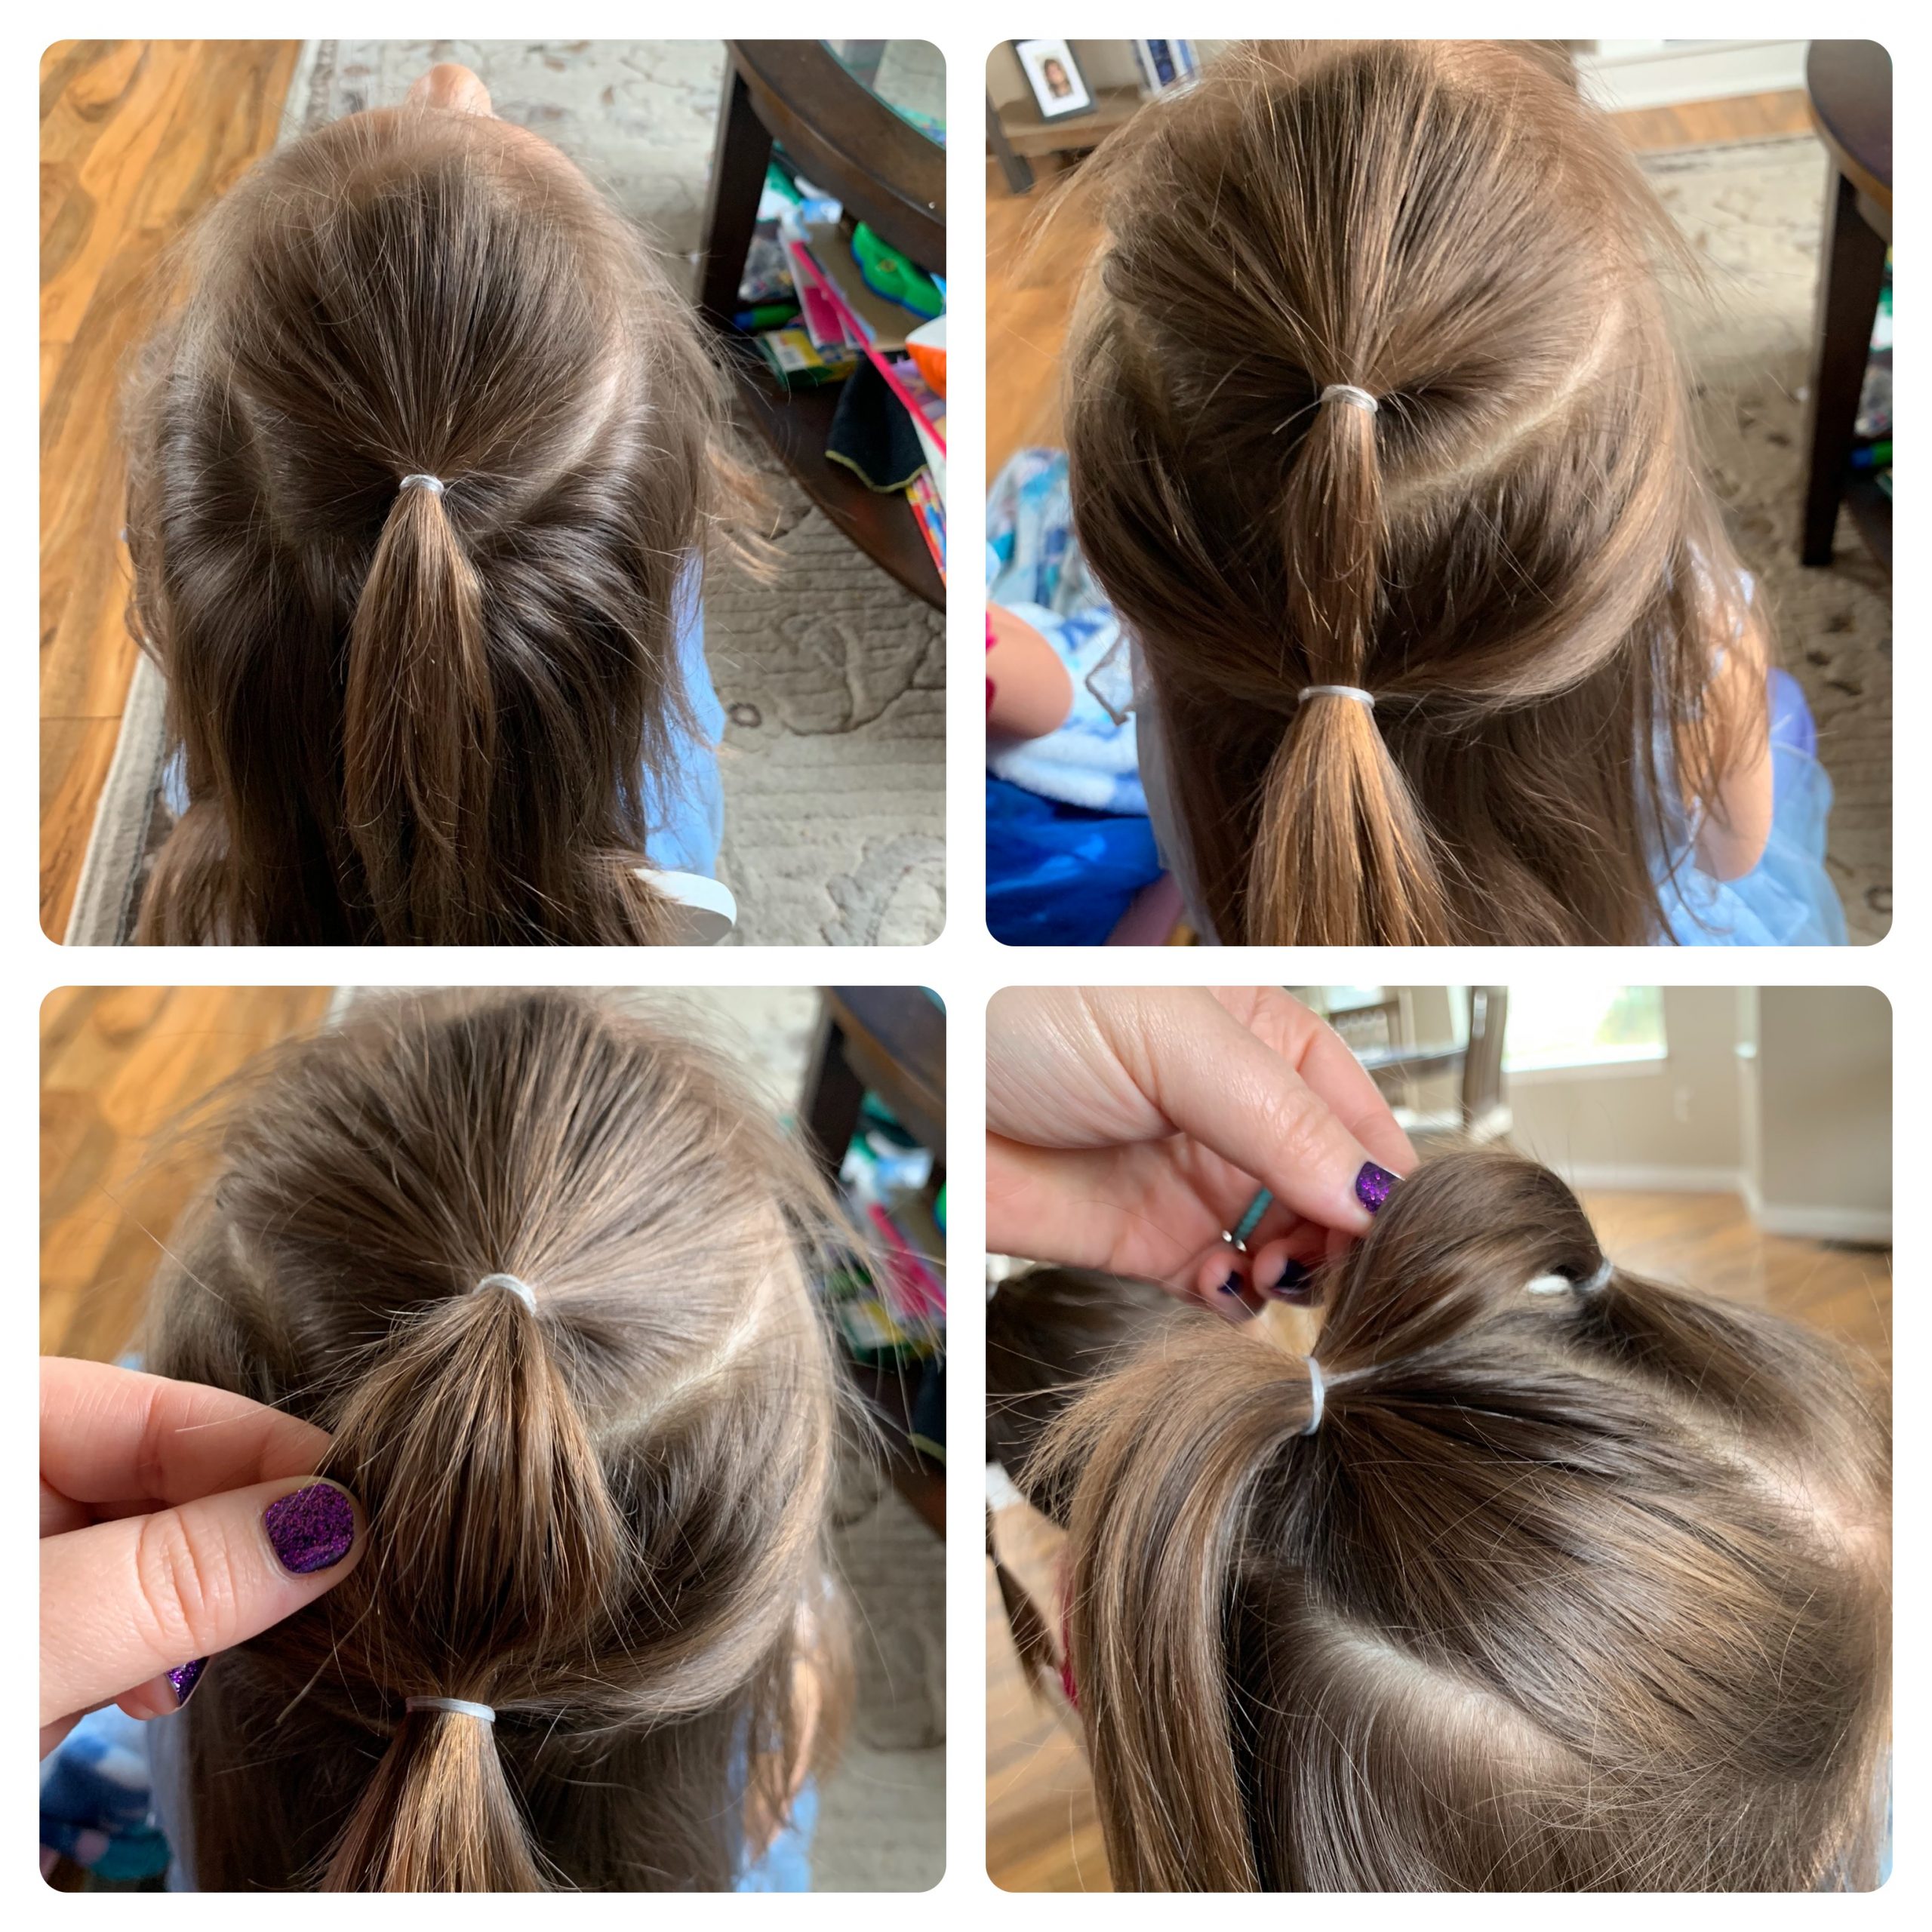
1. Gather a section of hair at the front center of the hairline and secure with an elastic.
2. Create a new section below the first, smoothing hair on the sides and including the free-hanging part of the first section. Secure with an elastic close to the scalp.
3. Gently pull on the part of the first section that was pulled into the second section, to create a bubble of hair. Pulling only on this part keeps the side hair sleek, while adding volume to the piece that connects the two sections.
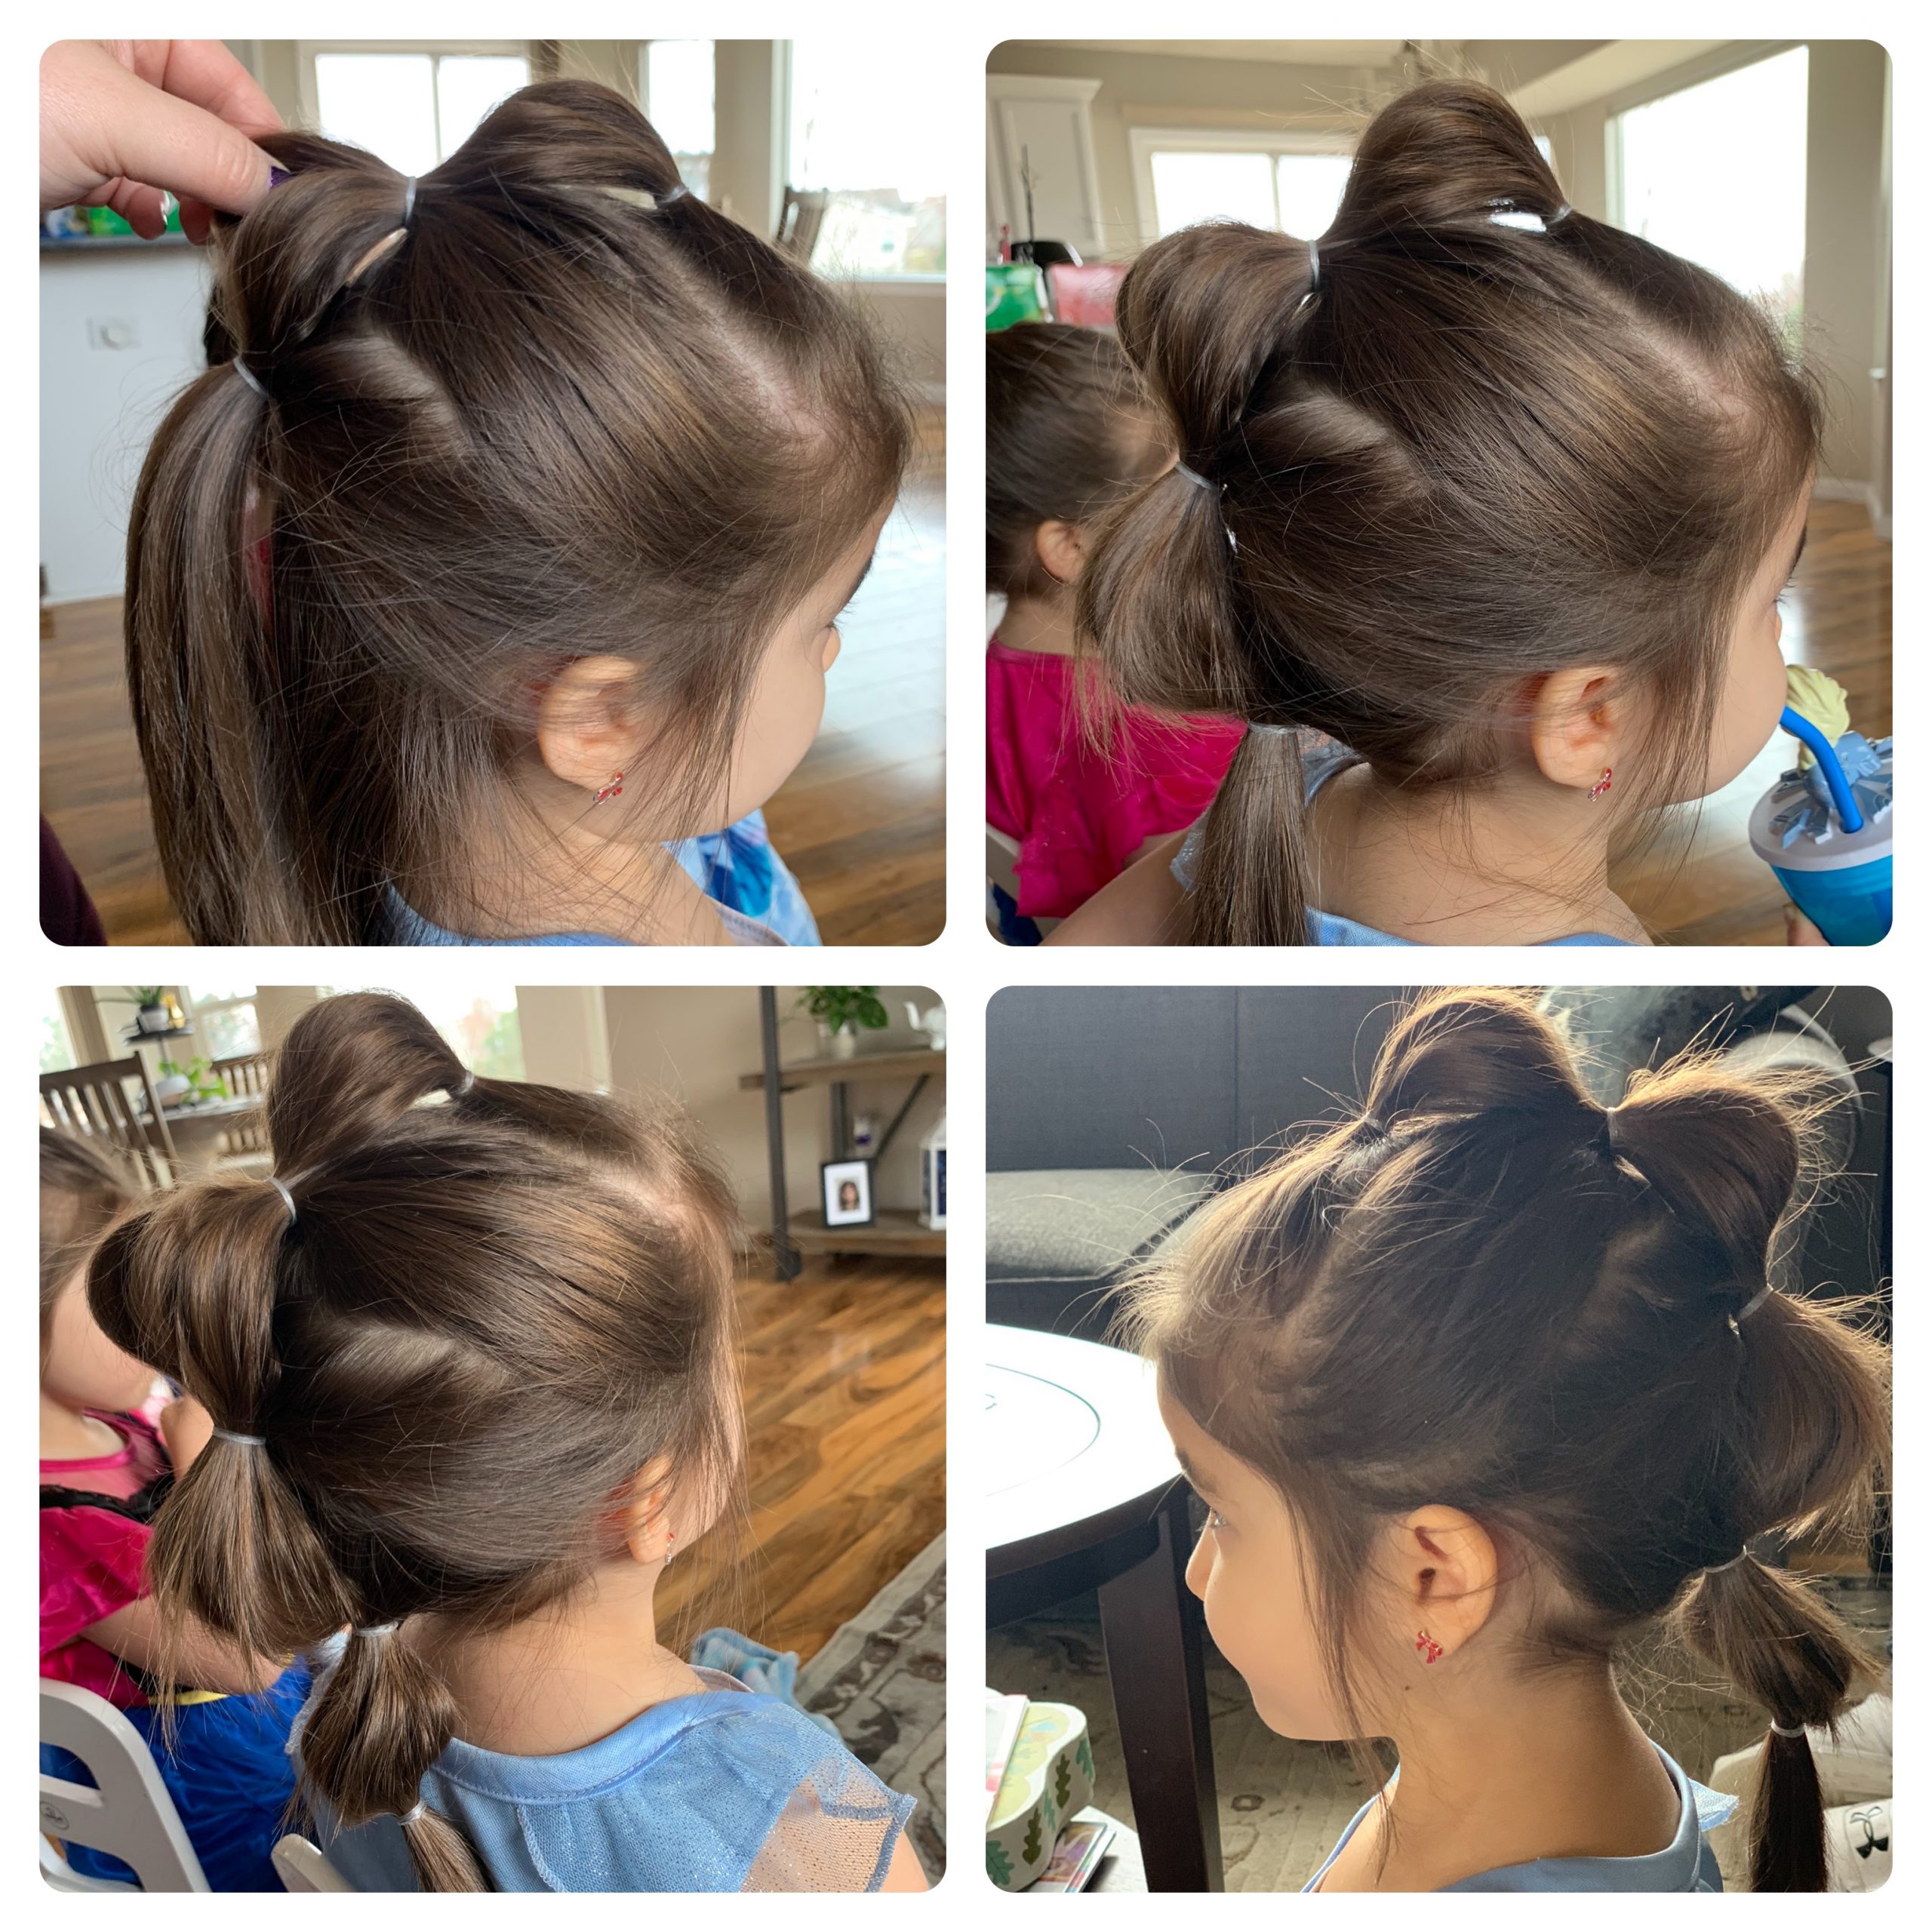 4. Create a third section farther down the head, again incorporating the leftover hanging hair from the previous sections and smoothing the sides.
5. Gently pull on the column of hair that connects the sections, creating a second bubble.
6. Repeat down the back of the head until you reach the nape of the neck. This can also continue down the ponytail for longer hair by securing elastics every couple of inches and gently tugging on the sides to create bubbles. This style has a very Princess Jasmine feel to it and gets lots of compliments!
After trying out a few kinds, these are my favorite hair elastics. They break the least of the ones I’ve tested, and tend to be gentler on my girls’ fine hair. They’re easy to remove with a nail clipper or seam ripper (I don’t reuse them, it’s not worth it to me to try to get them out in one piece). Spray gel is also nice to have, but a spray bottle of water will work just fine for smoothing flyaways and helping keep sections separate for more elaborate styles.


