


With the changing of the seasons, I get in the mood to change our home decor for fall. Grab all the pumpkins and gourds, fall color wreaths, blankets and pillows. I go all out and have fun with it. So while playing around with decorations on the porch, my boys asked if they could make a scarecrow. Why not? Let’s try it! We went hunting around the house for supplies to make their idea come to life. Turns out, it is pretty easy!
Ingredients of a Scarecrow:
 Head:
Head:
-
-
- Hat
-
- Face: Grab an old pillowcase, burlap sack, a plastic Jack O Lantern container or some material that you can draw on.
- Stuffing: plastic grocery bags, brown packaging paper, stuffing
- Extras: Markers, string and safety pins
 Body:
Body:
- 5 Gallon Paint Sticks
- Wire or an old metal hanger
- Old clothes
- Stuffing: plastic grocery bags, pillows or stuffing
- Extras: straw, gloves, shoes and leaves

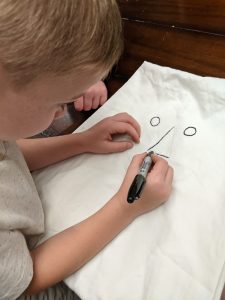
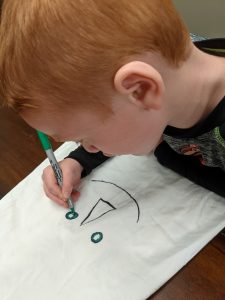
Now for the fun! Start with the head. If you are using a pillowcase, we found it best to stuff the pillowcase and shape your head first. To make our head more circular, we pinned back the two corners with a safety pin. We then removed the stuffing to make the face and color it in. Have fun with how you want your face to look! Once you have your face drawn on, you can add back in the stuffing to get the amount of fullness wanted. You are now ready to mount the head to the frame for the body.
How to Assemble Your Scarecrow
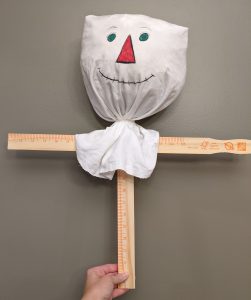 To create the frame for the body, we used two five gallon paint sticks, forming them in the shape of a cross. You can use floral wire or a metal hangar to wrap the two sticks and form them into the cross shape. Think about the size of your scarecrow’s head when determining where the two sticks should cross. When ready, stick the head of the scarecrow on the top section of the frame and tie the head on with some string. You can use wire for accomplishing this too.
Time to add clothing so you can start stuffing! Grab an old shirt, pants or even a pair of overalls. Add the shirt first, adjusting the head of the scarecrow to fit inside. Now you can start stuffing. Grab those old plastic grocery bags, filling, material or brown paper packaging and get to work. This was our kids favorite part! Once the arms are full, you can tie string around the base of the arms, same with the base of the shirt. Adding pants or overalls will determine if you want to tie the bottom of the shirt, so have fun with it. Use safety pins to keep the material together and keep the pillowcase inside the shirt. Once you are finished with the stuffing, you can add the finishing touches.
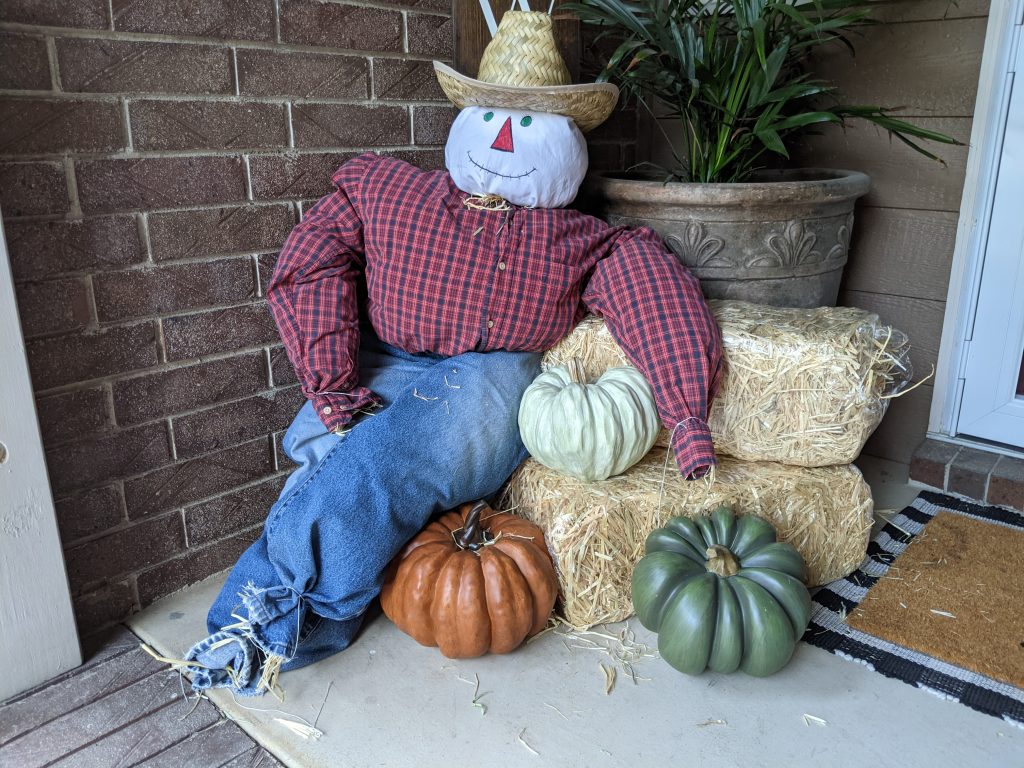
For accessories, grab an old hat, pair of boots or shoes and some straw. Use your imagination and have some fun. If you are adding straw, put some pieces by the neck, ends of the arms and feet.
Stand your scarecrow up or sit him down, my kids enjoy moving him around!

")
")


