


Summer is coming to an end and fall is right around the corner! It’s the time of year to gather for sports watching parties and quite soon, the holidays. I get eager this time of year for fall fun with friends and family.
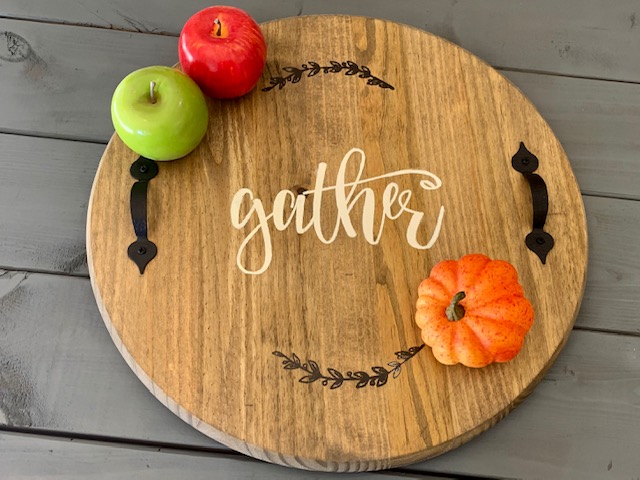
Fall also brings out the crafty side in me. I get a bit giddy thinking about the leaves and flowers in bold colors, pumpkins, and other cute autumn themed decor. I decided to make a serving tray for our fall gatherings such as watching football, rooting on my Sooners! I like to craft, but truth be told, I’m not great at it. I’ve had many Pinterest fails! Now, I generally go for simple, low maintenance projects. So if you’re like me, try this simple DIY project! It’s quick, easy, and cost just about $20.
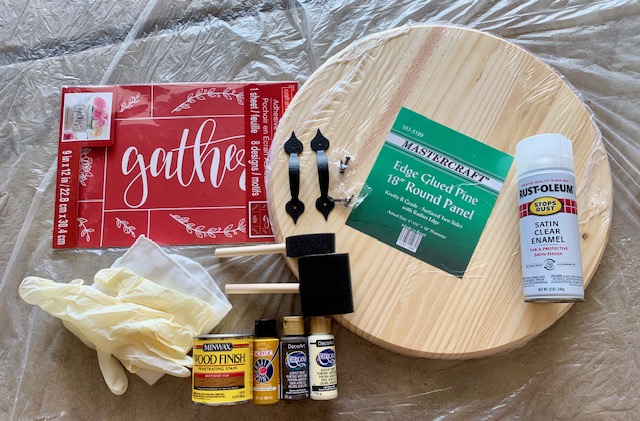
- 18″ round panel board (you could use rectangle or square as well)
- this “gather” stencil from Michael’s or other stencil of your choice
- craft paint colors of your choice
- stain color of your choice-sample size
- 2 drawer pulls of your choice
- sponge paint brushes
- thin tip paint brush
- clear enamel spray
- latex gloves
- old rag
- pencil
- tape measure
- drill, screw driver or hammer (depending how your drawer pulls attach)
First, go shopping for your materials. I recommend getting what you can at the home project store. I picked up my board, stain, drawer pulls, paint brushes, gloves and enamel spray at Menard’s for much less than the craft store would’ve cost. I then headed to Michael’s for the stencil and acrylic craft paint. I, of course, took advantage of their current sale and 40% off coupon via their app.
Choices, choices… Let’s discuss all the choices there are:
Boards – You could choose a round board as I did, or even square or rectangle if you wish. Mine came smooth and pre-sanded. If yours is not, grab a square or two of sandpaper.
Drawer pulls – There are many options to choose from. Menard’s has a couple isles full. I chose one of the cheapest styles, which happened to look great for this project.
Stain – There are many colors and finishes of stains. I chose one that was medium brown in color and transparent. I like the transparent as it lets the natural wood design show through. You can certainly go for more of an opaque stain as well.
Paint – Again, lots to choose from at the craft store. I went with the darkest brown they had and a cream color. A quick rule for these kinds of projects-you want your stain color and paint colors to contrast. Do not choose hues too similar or else the paint and thus your deign, will not show well.
Stencil – Of course, I chose the “Gather” stencil, but you certainly could choose another. I highly recommend using an adhesive stencil to help avoid errors.
Ok, choices are made and now it is time to get to it.
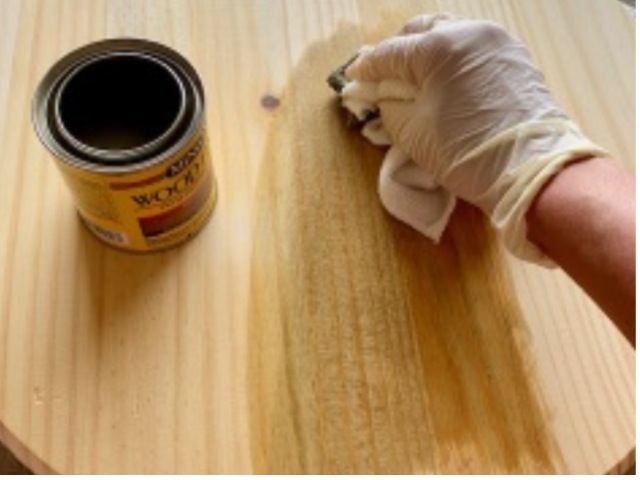
Step 1: Staining
The board I purchased was already smooth, so no sanding necessary. If you are using a board that needs sanding, do the sanding first. Be sure to wipe your board clean of sawdust. Get those gloves on to protect from staining your hands. Dip your cloth in the stain and simply rub on to the board, front, back, and sides. Let dry. I put mine in front of a fan for about an hour (timing will vary.) Check it before you move on to the next step.
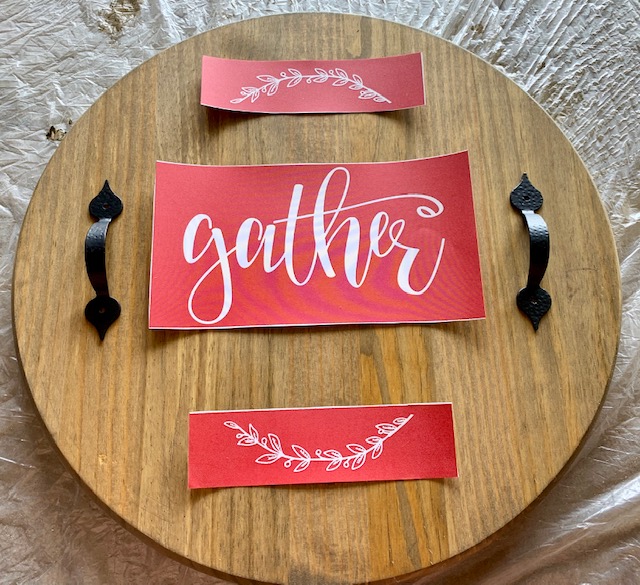
Step 2: Placement Planning
I laid out my stencil and drawer pulls to plan where everything would go. Using the tape measure, I made sure everything was symmetrical. Once I found proper placement, I made light little marks with my pencil as indicators where each piece would go.
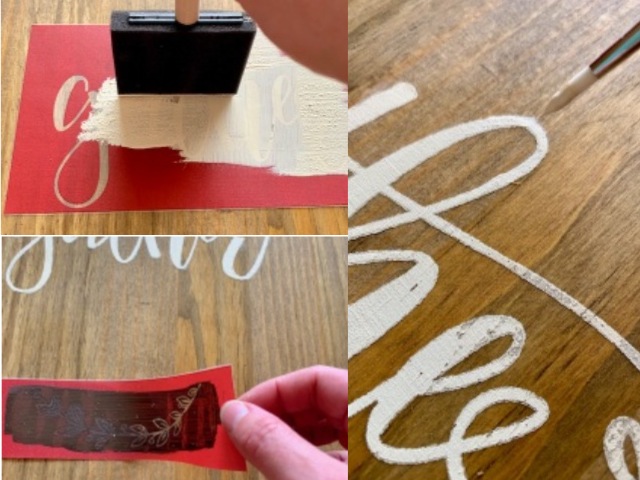
Step 3: Stencil & Paint
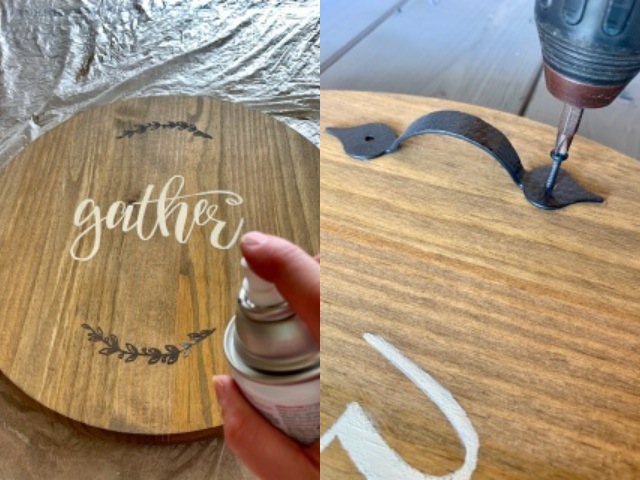
Pull the adhesive backing from the stencil and place onto your board. They don’t always stick well, so you may want to secure better with scotch tape. Dip your sponge brush into the paint and dab on rather than using a sweeping painting motion. This can help avoid paint from getting beneath the stencil. I chose the cream color paint for my “gather” and the dark brown for the foliage. Once finished with painting, go ahead and remove the stencil; you do not need to let it dry. Use the thin tip paintbrush to fill in any boo-boos that may have occurred. And if your paint went rogue in any areas, take a pair of tweezers and scrape off those areas.
Step 4: Finishing Touches
After the paint dries for a few minutes, use the clear enamel spray and apply a couple coats over your board to seal it. Grab the drawer pulls and screwdriver (or hammer) and attach those handles. Let dry!
Voila! You’re an artist! I hope you enjoyed this fun, yet simple fall project!


")


